Sunday, August 1, 2010

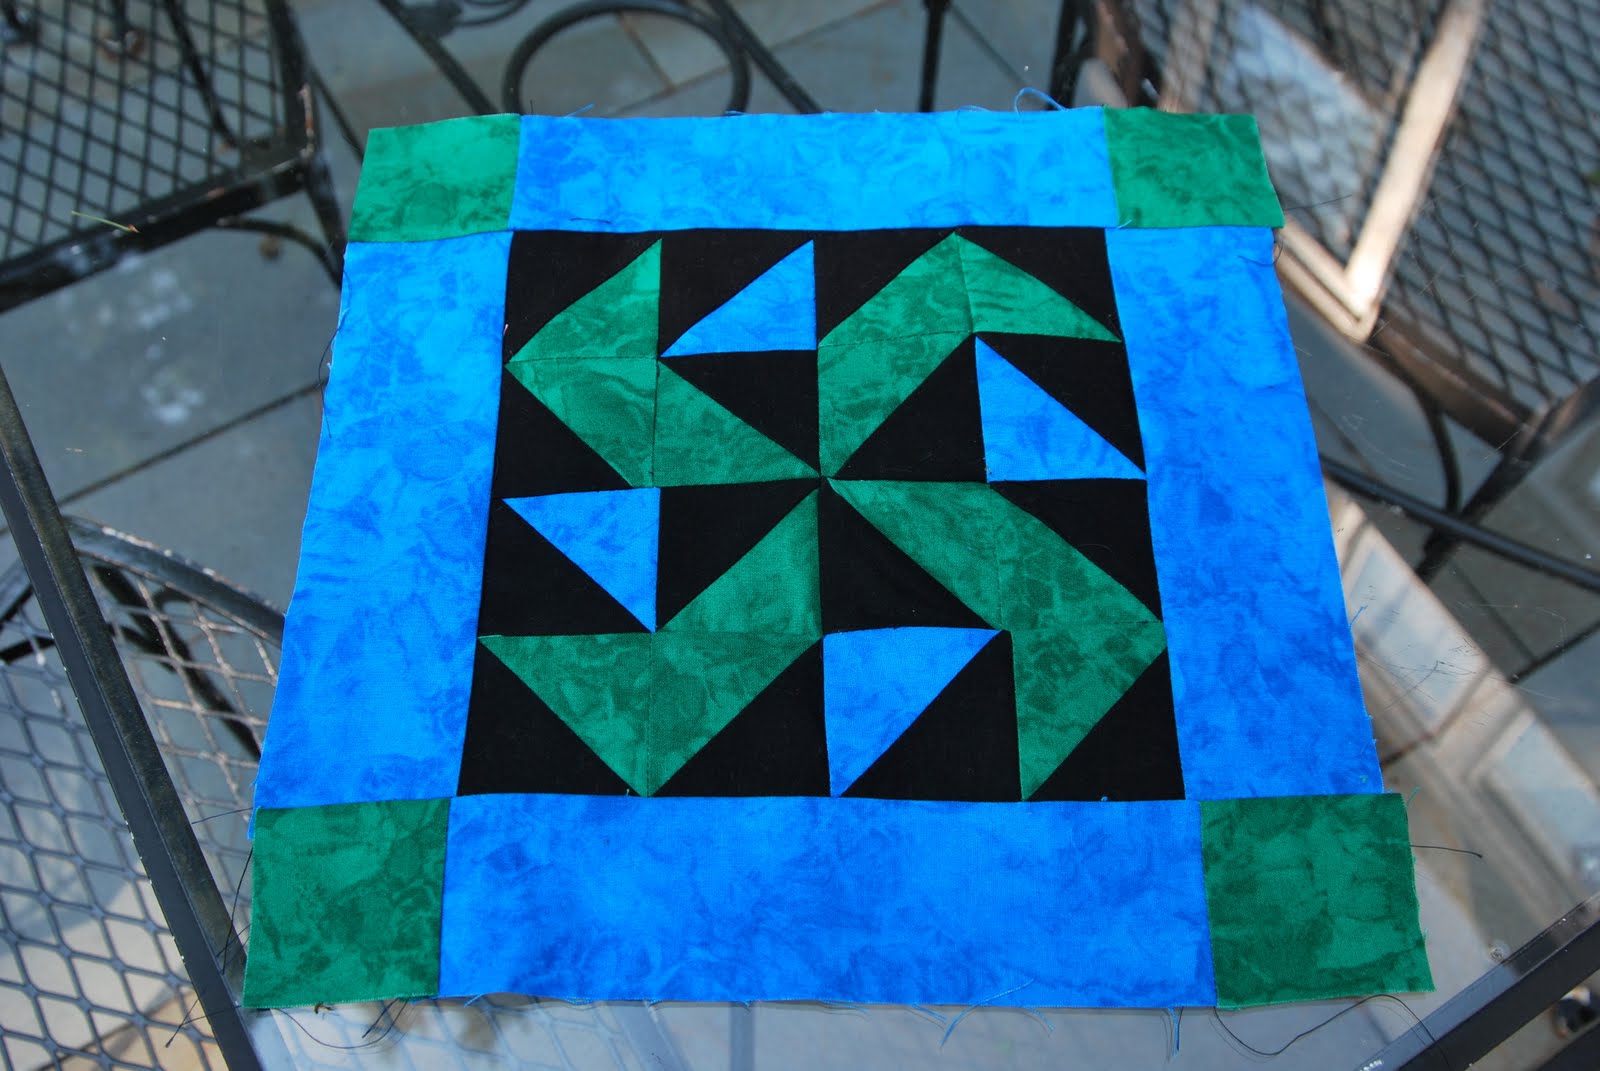
Starry Night BOM #2 - Much better!

I'm not sure if I mentioned this with my last block, but when I was at the fabric store buying that first block, I saw a co-worker there. She bought the other colorway, and we agreed to bring our blocks into work each month to share what they came out like. She emailed me last week, and said she was going to the shop last Monday and would I like my 2nd block. Well heck yeah! Sew Inspired actually had the blocks for August ready last week, a week early!

Peggy (my co-worker) had hers done two days after she delivered me my block, so embarrassed by her diligence, I got right to work on mine.

I actually think my second block came out MUCH better. My corners are much more exact. The only thing I don't really love is the way the lime and purple look together with the black. It has a Halloween-y sort of feel to me. But I do think that mixed with the other blocks it will be pretty.


This is what the first block looked like.


And here's a pic of the finished project, I don't think I shared this last time.


I've been working on garments so much that I forget how exacting you need to be with quilting. It's actually fun for me now to go back and forth between the two. What do you think? Do you like garment sewing better, or quilting and why??

Sunday, July 18, 2010

Starry Night BOM #1

The first BOM I joined, I only managed to get through 5 of. They came with a "class" and I just couldn't get there. This BOM is with Sew Inspired in Simsbury, CT. A fantastic store, that seems to "get" how to manage all of the details of these things.

The group is called Starry Night because they are inspired by Vincent Van Gogh. There were two colorways to choose from. Black, blue and green or black, yellow and red. Funny, I chose the darker colors thinking the wouldn't show dirt as much.

Here is my finished first block.


I am definitely getting better at cutting, but you can clearly see that my top border is not even. Nor do the squares line up with the side sashing. I WAS pretty happy with my points, but I realized that I had sewn a few of the boxes in the wrong order and had to unsew them and resew. Of course, the second time, the points were not as even. Finally, the center had just the tiniest bit too much fabric, and it puckered when I sewed the four boxes together.


Of course, these are all comments for a "perfect" square. Overall, I'm actually happy with it. I think the colors are going to be really pretty together. And I'll take all the practice I can get.

This block took me 1/2 hour to cut, and about 1 hour to sew (counting the unsewing and resewing!).

Monday, July 12, 2010

Bare Feet Only - My first floor mat

This is a huge accomplishment for me. I am the Queen of unfinished projects. Or, if you like a positive spin, the Queen of started projects. This great rug I started a mere 3 weeks ago!!

I got a wonderful package of fat quarters from my super creative buddy Bari of her Art Journal line. The colors just jumped out at me and screamed "make something with us!". And I happened to have this pattern on my cutting table, because I was thinking it was an "achievable" project, and VOILA! I'm pretty sure I got the pattern from Above All Fabric. The idea of a sewn floor mat/rug just seemed SO cool to me.

The pattern is "Bare Feet Only" by Sweetwater. There were only three pieces to cut (6 of each), but that was a bit deceiving. I really had trouble making the circular trim pieces neat. They are only about 1/2 inch wide, and clearly, I flunked kindergarten, because I can't cut on a line to save my life it seems. I also found it challenging to cut the double sided interfacing for these pieces. By the time I was done my pattern piece was a mess, and I wished I had traced it and left it in the pattern. I will have a hard time if I try to use this pattern again.


I just love the little nests in this fabric, and I managed to find the most perfect pearlized teal buttons in my vintage button stash. They match the teal really well. The sewing itself for this pattern was simple, however, I had a few problems there, too.


I realized how difficult it is to zigzag stitch around a flower and make it neat and even. When I took the rug out of the sewing machine to examine my work I was surprised just how non-curved some of my sewing was. That having been said, I managed to convince myself it looked "authentic" that way. Ha ha!


I didn't have enough large pieces of the Art Journal for the back so I went to Sew Inspired and found this Art Gallery fabric that I think coordinates really well. The Art Gallery fabric has the most wonderful feel to it, but it's a bit more silky than a lot of cottons I've sewn with, and it didn't hold with the adhesive spray as well as I am accustomed to.


The result was that the back of the rug ended up having a bit too much fabric and being sort of bunchy. Overall, I am not thrilled with the workmanship on this project. I sort of see it as a prototype or a sample. I wanted to see what the whole process was like more than I wanted it to be perfect.


That having been said, I am THRILLED with my binding this time. A wonderful blog reader, Sara Strange (find her blog "Joy in Everything" here), posted a comment about my first quilt binding with a link to a Monkey See video for slip stitching. WOW!! The video made it super clear what I wasn't doing right before, and after seeing the video just once, my binding went from so-so and unattractive to just exactly what I wanted. Thank you Sara!

My daughter has already claimed this rug. She loves the colors and the "cute little birdies". I can't wait to upload these pics to Bari's flickr group. I am crazy excited to be pumping out projects at this rate.

Tuesday, June 29, 2010

McCall's 5430 Vacation Skirt in gorgeous Timber Fabric

So this is the skirt that is one of my four projects from vacation. I did everything but the buttonhole, which I did when I got home this week. I got the Gingko Timber fabric (by Jessica Levitt) at Purl Soho when we were there this winter. I just fell in love with the colors.


I chose this pattern because I wear a lot of A-line style skirts. I think they flatter me best, and they are super comfortable and easy to move around in. Now, I don't know WHO on earth they had write this pattern up, but "skirt in an hour" is just hogwash. The pattern was fairly easy to follow, but the cutting alone took me 25 minutes. Then there was the interfacing, which took another 15. This, by the way, was NOT clear in the pattern, I put interfacing on more pieces than I needed to. Of course, if I did more than scan the directions, I might have looked at the pictures on the last page showing which pieces needed interfacing. Alas, I thought to myself "it's only going to take me an hour, how confusing can it be????" Am I the only one who deludes themselves with these thoughts?


That having been said, the only other thing that took time was adjusting the small amount of gathering to get all that fabric inside the curved waist band. Not difficult, just sort of "picky" work. NOT a one hour skirt. A two hour skirt, yes. But to my mathematical mind, they were off by 100%!!


I am very pleased with the final garment. I will definitely make another one. I made version A. I might try to make the version with the pockets next time. I did submit this also, to the Sew Mama Sew "Sew it Wear it" Challenge group on flikr. Some great submissions there, if you like to see what other folks are making.


Up next, I'm hoping to FINALLY finish the small round rug I'm working on. Super cute so far, and likely a gift for my mom. Pictures coming shortly...

Saturday, June 26, 2010

Vacation = Four Projects at Once

So I didn't get to post anything last week because I was on vacation, and I purposefully didn't take a laptop with me. I wanted to at least "try" to unplug a little bit. I did have my phone, and I did Tweet. But no surfing, no blog reading, and no shopping.

The results were excellent if I do say so myself. I managed to finally bind my first quilt, sew a skirt with some Timber fabric I bought last winter at Purl Soho, work on my applique rug, AND start cutting for my second quilt.

I'll post pics of the other projects as I move them along, but here is my binding...I would LOVE comments about what method people use to sew the back shut. I tried a simple slip stitch, but I couldn't get it neat enough, and it looked like the gaps were just too big...so here's what I went with.


I love how it looks from the front, and I'm ok with how it looks on the back. I'm anxious to get started on my second one though, to see if I can improve my technique.

I also managed to get in lots of fun with the kiddos, and go on a whale watch with them. We saw around 20 whales, and one group that included 3 generations, something they said was happening more and more frequently now, as the whale population gets a bit stronger.


AND I managed to find this pic of my Castle Peeps bag from Quilt Market, as it went on it's first whale watch! Thank you Lizzy!


The next day we got to visit the fabulosity that is Yummygoods, and our Unicorn Queen, Melissa Averinos. The kids were not very compliant, so I only got to chat with Melissa for 10 minutes or so. But let me tell you, if you have a chance to go, RUN, don't walk, to Yummygoods. She has wonderful, unique stuff. We did not leave empty handed!


We had a wonderful trip, and I can't wait to tell you all more about my projects. What I'm hoping to finish next is a floor rug that I'm making with Bari J's adorable Art Journal Fabric. Stay Tuned!

Monday, June 14, 2010

My first actual quilt...a super long term UFO

The weekend before last I took the kids up to Cooperstown to visit my cousin Amy and her parents (you can read more about them on my Mother's Day post). The weather actually cooperated, and it was a lovely 80-ish and sunny. I love going there because I really relax. This is me lounging, while Ally enjoys the pool with Auntie Amy.


Amy's mom, who is my Aunt Pat, is a crazy accomplished quilter. So I dragged my sewing machine and my first quilt top with me, thinking with Aunt Pat's guidance, I would swallow my fear of quilting and binding and just dive in.

This quilt top mind you, has been done for at least a year. The pattern is from an easy quilt magazine, I'm not even sure which one. But it's made with Mark Lipinski's Califon, the first designer line I ever fell in love with.


Of course, I forgot to bring my batting, so we had to make a lightning fast last minute run to a quilt store (as it was closing at 5 pm on Saturday!) to get some batting. I used this great green stuff that is made from recycled plastic bottles, and I actually really love how nice and heavy it makes the quilt feel. The top is about 42" square.

Aunt Pat helped me with the spray adhesive and get everything nice and flat. Then she said "Go ahead and baste it. Starting from the center, out into eighths." So I did. BY MACHINE. You can see what my not-so-smooth quilting looks like. It's not perfect...but I do like the look of the curved quilting stitches.


Of course, when she saw me she said "Oh, I meant by HAND. That's going to take you forever to rip out." I may actually have seen a tiny smirk when she said that last part.

Can you say UGH?? It took me a full hour and half to pull out the basting stitches. But it's done. And because I saw some of his amazingly gorgeous quilts at Market, I asked Scott from Blue Nickel Studios what his preferred binding method was, and he sent me a tutorial.


So my longest running UFO is slowing becoming an "FO". I have the binding started. I'll post pics as soon as the quilt is done. But I'm proud of getting this far.

Stay tuned!

Monday, June 7, 2010

Winner Winner Chicken Dinner!

The two winning entries were #3, Ellie from Craft Sew Create and #51 Chris M from sew_caffeinated!

Congratulations!

Please send me an email to restitcherator@gmail.com with your full name and mailing address and I'll get you prize right out to you.

Thank you so much, everyone, for the follows, and great comments.