Showing posts with label pattern review. Show all posts

Monday, June 1, 2015

City Weekend Square Dance - Waiting for Cora

This is my very favorite reason to sew.  Two of my very dear friends are welcoming their first grandchild in the next few weeks, and I couldn't wait to make the baby a quilt.  

I used Oliver & S City Weekend.  It was a fat quarter bundle that I got a few years ago at QuiltMarket and have been hoarding away for just such a special occasion.


My husband doesn't like the quilts hung up on our fence, but I love it.  It's just the right height for baby size quilts.

Front view

Blue for the sky, yellow for the sun, green for the grass.

Big striped backing

Adorable birds from Hideaway by Lauren + Jessi Jung

I have to say I am one of those who loves hand binding.  It's very relaxing but it also builds up the excitement, as you know you're getting closer and closer to another finish.

Blue Kaffe Fasset Aboriginal Dot for the binding

Here are some of the other Square Dance versions that I've done.  I have two others that I never took pictures of before I gifted them away.

Sock Monkeys

Seven Seas Organic

Forest Friends in Flannel

Tuesday, January 1, 2013

Holiday In London Duffle Bag - Starting the Year off with a BANG

At first I thought this would be my final project of 2012, but I enjoyed New Year's Eve with my family and finished this off today.   I made this bag for my daughter as a new overnight bag. She's been using a backpack that's just way too small, and not nearly stylish enough.

This is the Holiday in London Duffle Bag pattern by my dear friend Bari J.  As with all of her other patterns, this was well written, with helpful pictures, and a really good amount of explanatory detail.

I used some Tammis Keefe cat print that I had been saving for just the right project, and I think it's great for a girl's bag, that not to childish looking.  I think she'll be able to use this for a long time.

With the long strap

A few things I learned while making this pattern.  First, the type and quality of fusible fleece that you buy is SERIOUSLY important.  I made the long strap with a thicker version of fleece and it made it nearly impossible to turn the sides in 1/4" to press them before folding the strap in half.  The result was a too-thin strap.  I will be re-making that for sure.

Another learning with this bag is just how important it is to trim.  With so many layers, I had to pin like crazy and still some of the seams were not as straight as I'd like.

Finally, there were so many layers in some spots that I literally had to turn my wheel by hand to get the needle through the fabric.  (This was a great tip I learned from another of Bari's patterns).  If I let the machine try to stitch through all those layers, the needle just jammed.  By hand turning, I could get through the 4-5 stitches that were just too thick for the machine.


I am very happy with the way the bag came out overall.  I didn't realize that I had bought a goldtone zipper and silver hardware.  This is my biggest beef with how the bag came out overall.  On the plus side, the zipper opens nice and wide because of how long it is, so you can easily fill the bag, and see the inside (which ALSO has pockets!).


Things I didn't take pictures of, but are important to note...the whole bag is lined.  I used a pink and white houndstooth vintage sheet that I bought from an Etsy seller that was PERFECT.  I think using a light color inside will make it easier to find things.  It also has a hard bottom insert to keep the bag looking firm and sturdy.

Overall, this pattern gets an A+.  I will be making more for the other kids to be sure.

Friday, July 6, 2012

I'm a Copy Cat - State Street Tote by Bari J

You all already know that I love my dear friend Bari J. And you know that I am a huge fan of her patterns, and her "Keeping it Real" sewing philosophy. Well, when I saw that Jeni from In Color Order did a review of Bari's State Street Tote pattern, and how AMAZINGLY gorgeous it came out, I had to make one of my own.

The first thing I will say, is that the pattern cover was deceiving to me. This tote is much larger than I expected it to be. I hadn't made one because I thought it would be smaller, and well, I tend to carry a lot of junk around. The size of the bag is fantastic. It works out to be about 14" square and the handles are JUST the right length to put it over your shoulder (to distribute the weight of all that junk).


I used fabrics from three of Bari's lines of fabric. Some of my precious Full Bloom (the pink for the interior section", some of my Art Gallery, with the script writing, that I've been hoarding for just the right spot, and some Paris Apartment. Do you believe that three of her lines go this well together??


The interior is so roomy, and has a great divided pocket.


Another thing I didn't realize from the cover photo of the pattern is that BOTH of the sides are actually pockets too!


When you see it from the top, there is SO much room, and it's so sensibly constructed that you can use every little bit of room without your junk sliding around. Pure genius I say.


As always, Bari's directions were fantastic. Her detailed images that are used to show more difficult directions really make things clear. It took me around 3 1/2 hours total to make this bag. A time bargain!

Things I learned while making this pattern:

1. Precise pressing is really a big differentiator when you're making bags. Just like sewing, my pressing has improved greatly over time. I could really tell a difference with this bag how much neater everything came out and how smoothly things went together because of good pressing.

2. Lots of layers makes for even more difficult lining-up. I worked like crazy to get my side seams to line up. When I flipped the bag right side out I was not satisfied with how one of the sides came out. Your ideas and thoughts are welcome.

3. It's really important to have your lining/fleece cut as precisely as your fabric pieces. One of my sides was exact, the other side, my fleece was a little wonky, and it made for a tougher go of lining things up (see point number 2!).

Now go get yourself this pattern, and make one of these totes! You can buy the pattern here in Bari's online shop, and at many other online fabric stores.


Sunday, November 20, 2011

Izzy N Ivy Addie Jo Pattern Review - Adorable Skirt pattern!

I got this pattern as part of a kit from Above All Fabric. I love Melanie's kits. She does a great job choosing fabric choices and makes it easy to get the package in the mail and start sewing right away.


This was the first Izzy N Ivy pattern I've made. I always love trying new pattern designers, and this one did not disappoint. The pattern comes with 5 different style choices. My daughter chose version C, which had a ruffle at the bottom of the simple skirt top. This was my absolutely FAVORITE pattern type. The directions were very well written, with clear diagrams inside and it was easy to follow along with which version of the skirt I was making. The directions were fairly short, none of the versions of this skirt were very complicated. I made a modified size 6. My daughter is a skinny Minnie, so we have to really decrease anything with a big waist or too much fabric. This worked out perfectly, between the elastic waistband that I could cut to fit her, and the "just right" amount of fabric for a nice twirly skirt that was not too much to overwhelm her little frame.

Also, it came in a ziploc bag, which is wonderful. The cellophane with a sticker I always manage to make a mess of, rip the sticker and the cellophane gets stuck to another pattern. The directions were on nice thick stock, printed in an easy to read font. Perfect.


I would absolutely make this skirt again in another one of the versions. It went together very quickly. Including cutting, I would say a total of 2 1/2 hours. The only reason it took me that long is that I am NOT a good gather-er. I always break at least one set of gathering stitches and have to start over. Thankfully, this time, it was only once.


Who are your favorite pattern designers? For quilts and for clothing?

Sunday, October 23, 2011

She-Werewolf...from a vintage Simplicity 9206 pattern!

I keep saying this every time I mention this project, but I am SO happy with how it came out. This is the werewolf costume I made for my 7 year old daughter for Halloween. We had to hunt for a pattern that she liked, and when we found this one, the smallest one I could find was the 8-10. She's no 8, so I had to re-size the pattern pieces myself to make her a 6, which is something I've never done before.


There was virtually no "fitting" to this costume. It went together like a raglan sleeve set of zip up pajamas. A nice easy fit so that she can wear clothes underneath. As great as this looks, it certainly is no Project Runway garment.

We were looking for something scary, but still, well, cute. I think we found it!


Maybe a little tough. 7 year old girls don't get to feel tough very much.


Of course, the tail was a HUGE hit. There was much butt swinging and wagging to see how she could get the tail to move.


She did a lot of practicing with her "RRRAAAARRR" noises and holding up her claws. I am told that we have to cut the teeth out of the hood part. She tells me that she thinks she looks like she's in the werewolf's mouth.


Best of all, it's made of FUR. So it's super warm, and plenty cozy enough to actually lounge around in.


Given our success this year, I can absolutely see making more costumes in my future.

Friday, April 15, 2011

Joel Dewberry's Sewn Spaces Yoga Mat Bag - Pattern/Book Review

So, if you follow me on Twitter, you know I've been going to Bikram Yoga classes. I've gone enough that I thought it was time to make myself a bag to carry my mat. Not just for going to class, but also for at home. Instead of being propped up in the corner, I can actually hang my mat up now.

I just happened to be trying to organize my HUGE collection of sewing books and I noticed a pattern for a yoga mat bag in Joel Dewberry's book Sewn Spaces. The pattern looked pretty straightforward, but I liked the use of multiple fabrics, so away I went.


This is pretty much the amount of detail that is shown on any of the projects in the book. It's sub title is "fresh and modern fabric projects for your life and home". Most of projects are home goods with a few other things thrown in. There are cards, a teddy bear, and some great patterns for chair pads and the like.


I chose to use some of my Anna Maria Horner Innocent Crush not just because I love the prints, but also because they're darker and I thought they wouldn't get dirty so quickly.


As I started to assemble the bag, I realized pretty quickly that the directions were pretty brief. I learned a long time ago to READ THE WHOLE SET OF DIRECTIONS BEFORE STARTING THE PATTERN. I must have read through pretty quickly, foolishly "ass"uming that it was an "easy" pattern and I didn't need to look too hard. I was mistaken.

For the LIFE of me, I couldn't figure out how to make the drawstring casing so that it wasn't closed shut. The pattern referenced an earlier project in the book to make the drawstring itself, which I also read too quickly. If I had looked more closely, it talked about using buttonholes as an entry/exit point for the drawstring. But to be truthful, after re-reading it multiple times, it still wasn't clear in terms of order of steps to get the buttonhole made, and not sew the layers together. I had to rip it out not once but twice. I'm really glad the bag is for me, because the top is sort of uneven and stretched looking.


I am quite happy with the way the bag came out overall. I love the look, the mat actually fits in the bag the way it looks in the book, and now that I've made it (it took about 3 hours total), I could easily make it again in half the time. The pocket was a little bit tricky, but not too bad. I don't have a button cover maker yet, so I still have that to do, to add a button to the pocket.


Notes about the book and pattern...first and foremost, I LOVE Joel Dewberry's fabrics. I love his color choices, and aesthetic. I love the projects in the book. The choice of projects is great, and the photography is very pleasing. That having been said, you would actually have to read the whole book, or make the projects in order (which I NEVER do) to understand all of the directions easily. The patterns are not written for beginners, I don't think. There are very, very few pictures of how to lay things out or what things look like as you're sewing. That's one thing I really utilize in a lot of patterns I make. The illustrations and drawings. Finally, I think for just a few more sentences, which would easily fit onto the page, the directions would be much more clear.

I also got a gorgeous spring day to take pictures, so I took them all outside. I couldn't take an action shot of myself with the bag. Maybe on Sunday when I go back to class I'll have my husband take a picture of me.

Tuesday, January 4, 2011

Edith Twirl Skirt - Pattern Review and Pictures

I know, I know...it's been weeks since my last blog post. I have been working on a number of great projects, but the prospect of taking things out in the frigid cold to take decent pictures has not been very enticing...throw in the holidays, a snowstorm and well, you get the idea.

I wanted to get started again with a BANG, so I want to share my review of a pattern by the crazy talented Jona G. of Fabritopia. She has her own line of sewing patterns out, and I was fortunate enough to have her as one of my roommates at Quiltmarket in Houston in October.

The pattern I made up was her Edith Twirl Skirt. It comes with sizing for 2-10 and two different styles. I made a size 5 in View A, the one with only single fabric for the main skirt body (shown on the left in the pattern cover).


There are a few things that I LOVED about this pattern. First and foremost, there are no pattern pieces!! The pieces are all rectangles or strips cut the width of the fabric. What that means is that I can use this pattern over and over again, in different sizes WITHOUT TRACING. Can you say Hallelujah?? It also meant that it was quick to prepare, and I got right to the sewing.

The second thing that I loved, is that the paper it's printed on is very sturdy, and it's a single fold out page, two sided. WHAT did that just say??? No crazy pages to fold and try to re-order? That's right! Just follow, and flip. Again, simplicity is often genius.

The pictures that Jona included are also very clear. I did have to pull out and re-pin one part. Thankfully I had not sewn yet, and I realized by looking at the shading on the pieces that I had them placed incorrect sides together. The directions were clearly written, and the graphics were very helpful.


I bought a number of pieces of Anna Maria Horner's Innocent Crush after I saw it at Quiltmarket in October. It is just GORGEOUS and the fabric quality is outstanding. My daughter Ally chose three of the patterns and told me exactly where to use each of them. The result was just adorable. No pictures actually on Ally yet, but they will come.


I will say, that is a whole lotta' skirt for a tiny girl. My daughter is only about 37 pounds at 6 years old, so she's a Skinny Minny. But she loves the volume.

Other things I would note about the Edith pattern...

There is some serious gathering to be done with this pattern. If you are not comfortable with gathering techniques, this might not be the first one I would try. I thought I actually enjoyed making ruffles and gathering. That was until it took me three tries to get the gathers for the skirt lining to match up with the outside skirt panel. The results, though, once I got it, look adorable. My only comment would be this is not necessarily a beginners pattern.

And then, there was the snow...


On another note...we got that big blizzard the day after Christmas that the rest of the Northeast (and some of the SOUTHeast) got. We ended up with maybe 12-14" at our house. Ally LOVED it. The dog, not so much.


Here's my fun girl doing one of her favorite things to do in the snow...make snow angels. And boy, is she good at it!


What did you do over Christmas vacation??

Friday, April 23, 2010

Vacation Week Sewing Treat - Kyoko Dress

This is the week my kids have had for April vacation. Crazy late it seems to me. Everyone else has been on vacation, come home, and is back at school. My "day" job has been really busy (see my earlier post), so I couldn't take the whole week, but I did manage to squeeze in 3 days off. I knew I had only so much time, so on Tuesday night I cut...and yesterday, I dove in.

I've been saving some Meadowsweet from Sandi Henderson that I bought, you guessed it, from Melanie at Above All Fabric. I really love the color palatte, especially the orange and the lime...and for some reason, the plaid just SPEAKS to me. I decided to try it with Patty Young's Kyoko dress. My five year old is dress crazy, and I know how beautifully Patty's patterns are and how well they fit my peanut. The result was nothing short of stunning!


We ran a few errands this morning, and without exception, everywhere we stopped, someone commented on Ally's dress. Maybe she's used to it now...but she sort of smirks and says an exaggerated "Thhhank you!" Truth be told, I love when people ask me where I bought it. And when I say "oh, I made it for her" their mouths always fall open. *LOVE THAT*

One of our stops today was at CVS, where she got some new sunglasses. She didn't really want to pose, so her focus is more on Snow White on the arms of the glasses.


The pattern went together super smoothly. I would say maybe 2 hours of actual sewing and pressing time. I take forever to trace patterns, and cut them out. I also take forever to pin. I am mad-crazy over pinner. Mostly because I keep trying to NOT pin, and I have to "un-sew" because it's crooked.

The only challenge I ran into was in making the obi. I had another print cut, and was informed by my lovely daughter that it wasn't "the one". So I cut a second. Funny, I like her choice better than mine, but in cutting the second set, I rushed. And the two were not 100% equal on both sides (from my too-quick rotary cutting), so I had to go over some of the areas twice, because one side was narrower than the other and the stitches didn't catch the fabric underneath. *NOTE TO READER* this is not a short coming in the pattern in any way. The directions are clear, and actually really easy. I just tend to get ahead of myself.


I love when I start something, and it goes together this easily, and the result is so fantastic. I also traced this pattern, instead of cutting it, so I could use it again in another size. It was the first time I had used a tracing wheel. I love it when those "easy" tools work as well as this one did. I will be much more confident using it now, and will likely get a lot more use out of my patterns.

What do you think of my print mix? I'd love to know what you think works about it, or what you'd do differently.

Sunday, April 18, 2010

Green Living Market Bag - by Bari J. Pattern Review

So, I am not quite meeting my goal yet, of blogging once a week. But hey! I'm posting more often than last year, and I'm actually starting to remember to take pictures of the things I make, which is a big improvement. I'm all about progress...not perfection.

My official Quilt Market roomie (*squealing with excitement*) Bari J. asked me to test another pattern for her. And FAR be it from me to say no to some fat quarters of yummy fabric and an early sneak peak of a pattern! I tested her Green Living Market Bag pattern that was one of the four in her first grouping of designer patterns.

This is how the finished pattern looks...and as a side note, this is my favorite style. The pattern is like a booklet (with pretty glossy paper) and the pattern itself is on sturdy white paper folded inside. It's also in a zip top bag. I'm sure this costs more money, but GOD does it make for longer lasting patterns, and easier storage.


The rest of the photos were taken by Rob, my photog extraordinaire. He actually puts the majority of his stuff right on Facebook...but I figured this was a shameless enough plug.


The pattern went to together really easily, and I love the ribbon to tie it together. It actually folds down into a tiny square so that you can either put it in your purse, or you can put a bunch of bags together to go to the store and not carry what looks like a tent.

My biggest challenge with the pattern was folding the pointed ends of the flat bottom up on either side. The only challenge was that the fabric was many many layers thick. So I actually used a denim needle, and sewed really slowly. It gave the bag a very polished looking exterior, instead of just the normal flat bottom.


I'm pretty sure my mom is getting this for Mother's Day, so mom, if you read this...sorry to ruin the surprise! It's a great bag to carry books, groceries, or better yet, I actually carry mine in my purse, so that when I stop in somewhere like the pharmacy, or even somewhere at the mall (*gasp*) I don't have to take a plastic bag.

Think green, and look super fashionable. Gotta love that.

Saturday, March 27, 2010

This UFO is finally "F" - Fig Tree Bon Voyage Pattern Review Garment Bag

I'm on a roll folks! And I'm going to run with it. If I've learned anything in life so far, it's how strong and powerful momentum can be. I've had this unfinished project on my sewing table....wait for it...since November. It was supposed to be a Christmas gift! I do realize in the grand scheme of sewing lives, that's not even "long", but it's been taking up valuable space and taunting me...so finish it, I did.

The garment bag is for my mother in law. Every time she comes to visit us for the weekend (yes, weekend) she brings bags, and bags and BAGS of stuff. I decided that she needed something personal to carry it all in. After much digging, the Fig Tree Bon Voyage bag looked to be exactly what I was trying to find for her.


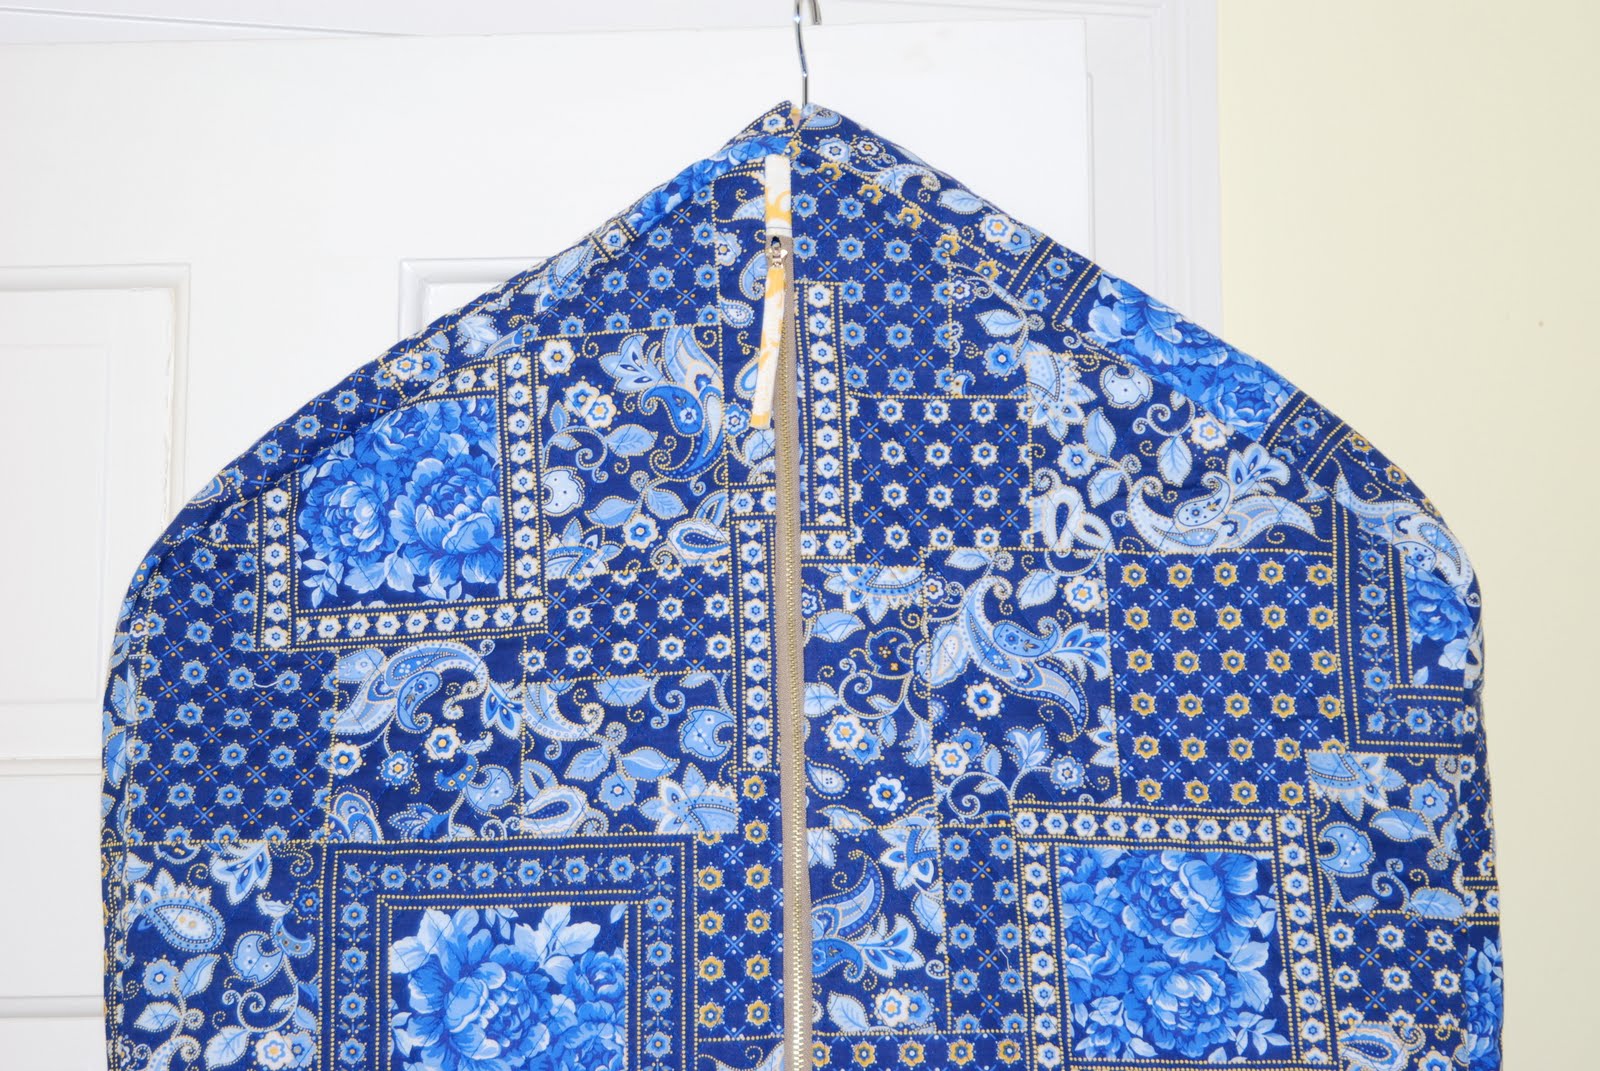
After reading the pattern, and realizing my own limitations as a quilter, I decided to go ahead and buy pre-quilted fabric. I know, I know...I can hear the gasping and choking and see the chest clutching from here. But really folks...I'm a sewer first, and a quilter, like, 10th. My quilting skills are still very mediocre at best and I wanted to be able to focus on the construction of the bag. Besides, this print is SO my mother in law. I know she'll love it. (AND, it took me over 4 1/2 months as it was!).

Here's my finished product:


A few things to note about the pattern before I start. I didn't use a contrasting gusset fabric, as they did in the photo. Nor did I add on the optional pocket. I had a lot of trouble trying to figure out the placement of the pocket, and how it would work without your things all falling out, and I made the executive decision to just not add it. (Again, it took me over 4 1/2 months as it was!)

What I liked about the pattern the most, was the labeled pieces diagram at the beginning, which were also color coded. Had it not been for these, I would have struggled even more than I did. The steps were laid out well, and the overall directions were written very clearly.

What I didn't like about the pattern was the lack of detail around how you got the two gusset sides to come together at the top. I couldn't for the life of me envision it while I was putting it together, and there was no graphic or diagram in the pattern. I ended up trying a few different ways before I got it work out the way I think it was intended. Now that it's done, it looks great, and actually is pretty straightforward, but...alas...as is often the case, I overthought it.

Another thing I really love about the pattern is this:


All of the interior seams are bound and it gives the bag a really lovely, "finished" feel.

I also did add a little zipper pull, beacuse there wasn't any mention of one, and the only zipper I could find that was long enough was brass and isn't as smooth as I'd like. The long pull makes it much easier to slide it up and down to open the bag.


One photo on the back of the pattern shows the bag folded in half using the loop, and I really liked that feature. Especially if you have to travel on a plane or somplace that you are super limited in hanging space. You could fold the garments in half, and the bag looks fantastic, and I think, given it's structure, will hold the clothes nicely.


All in all I'm happy with the final product. Please, under no circumstances ask to see what the inside looks like, or for detail shots. This is most definately a "prototype" version.

I would say this pattern is for an intermediate sewer, at least. It's certainly not a beginner pattern. But the end result is polished and chic looking. If I had actually chosen the fabric and quilted it myself it would make a downright gorgeous bag.