Saturday, January 22, 2011

Tools of the Trade

I had a wonderful rare, day to myself today. Not just an hour or two, but 9 AM to 4 PM. I spent a great deal of time this week deciding how I'd spend it, and as I'm sure you can imagine, once it started, it flew by!

After a manicure and pedicure (the world's best accessible luxury), I headed off to JoAnn fabrics. When I need a bunch of supplies, this is usually where I go. The other hobby/craft stores in my area have little to no sewing tools. I had made a list of things I'd read about (like the quilting gloves in Bari J's new book "Inspired to Sew") and I've seen the binding clips on a number of quilts-in-progress on Julie's (Jaybird Quilts) site. I have two quilts that need to be quilted and bound, so I want to be ready, right? Somehow, I always manage to come home with a bag full of stuff.

I try to spend the vast majority of my sewing dollars at either online independent stores, or local quilt shops. Alas, sometimes I need to go to the Target of sewing...and here's what today yielded.


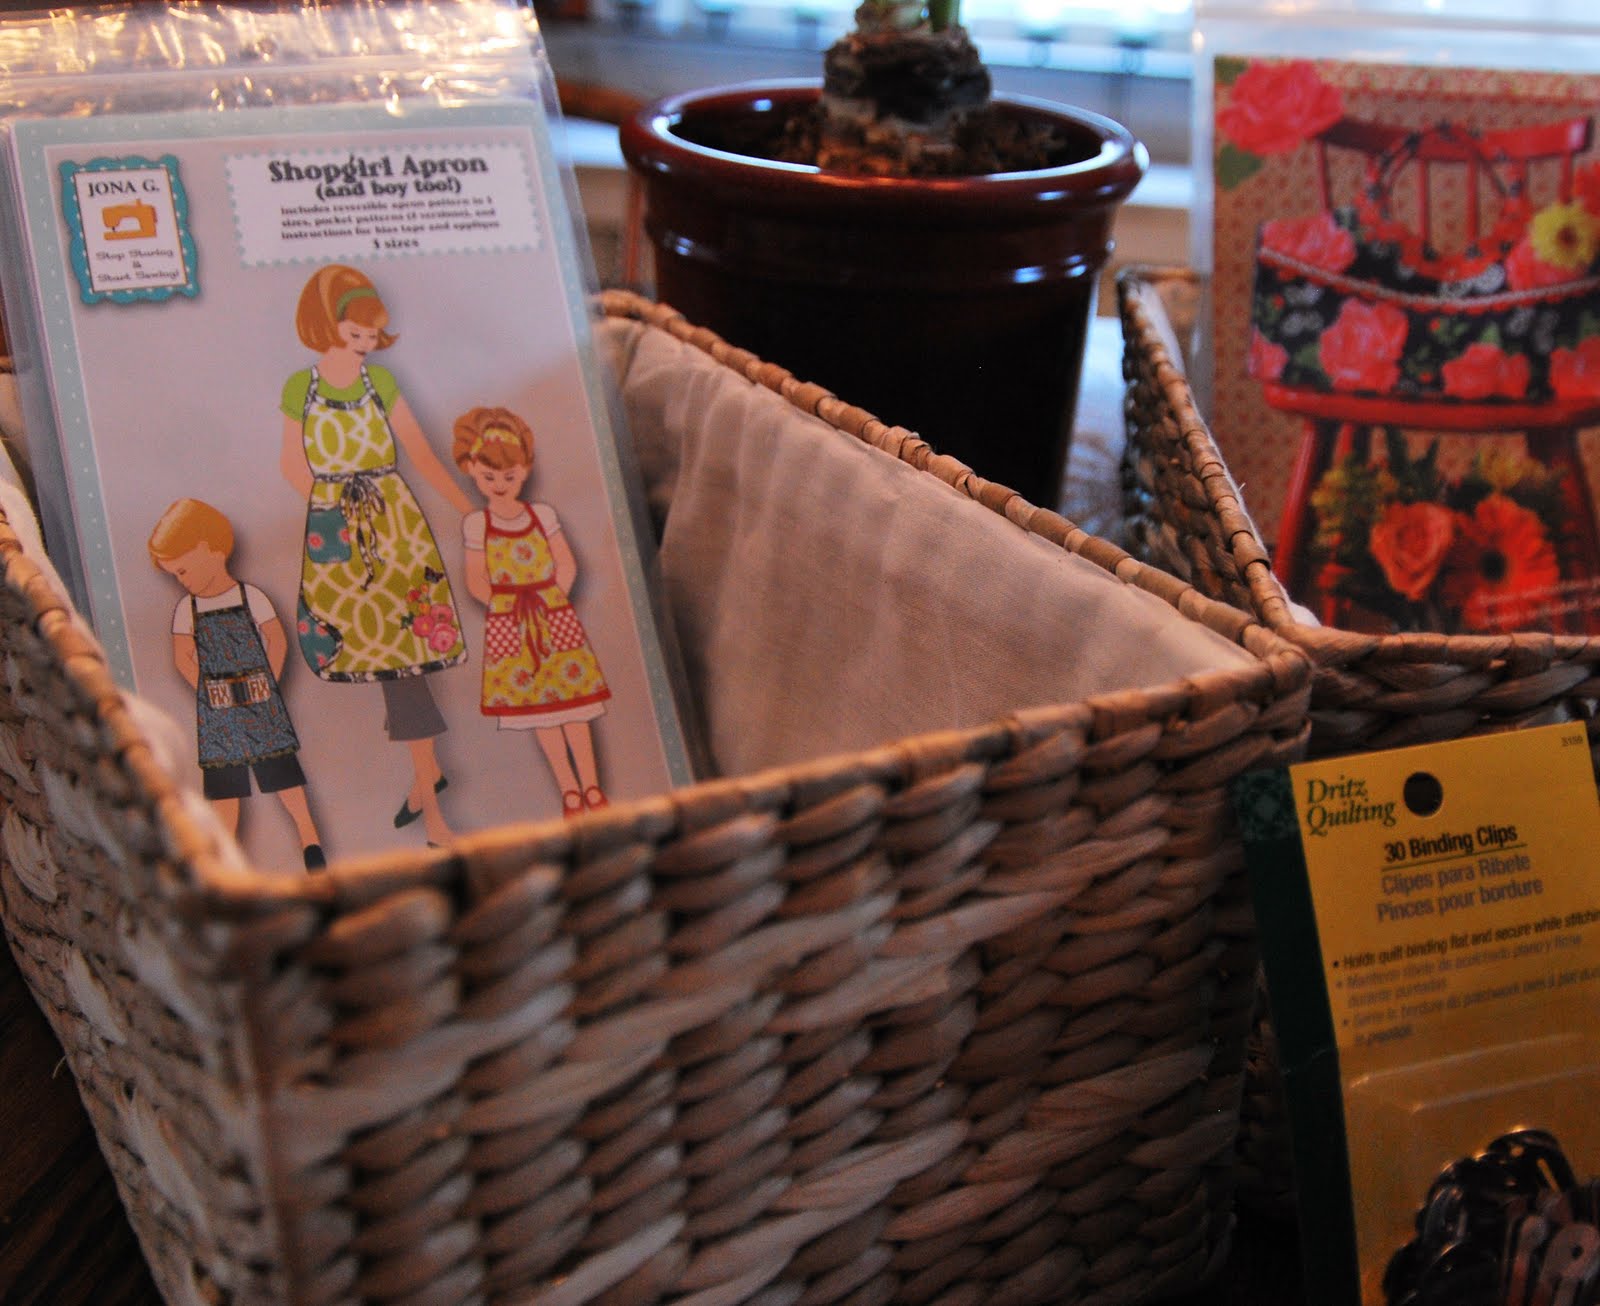
The best purchase by far are these great baskets to hold all of the many patterns I accumulated last year. They were $5 each, and i think they look so much nicer than a plastic bin. One of my goals for 2011 is make fabric ones for my sewing room, but in the meantime, I had to clean up the mess!


The other great thing I got was a Clover mini-iron for my upcoming work on the Roses of Remembrance BOM. Everyone I speak to says you "HAVE" to have one of these to make applique easier.


Truth of the matter is, I am a total tool geek. Not to mention a magazine hoarder. I can't wait to dig into my new issue of Stitch magazine.

But here's what I'd like to know...what are YOUR favorite tools? What can't you sew without?

Tuesday, January 18, 2011

My newest toy - Accuquilt GO!

If you follow me on Twitter, you know that right after Christmas I scored an Accuquilt GO! at Joann for the amazing price of $199. I guess it was Christmas gift to myself. I had been complaining about not being able to cut anything straight. Funny thing is, just as I was getting better at cutting, I bought this really fun machine.

I was trying to figure out what to try first with it. It comes with one template, that has squares and triangles, but I wanted something more. After scouring the internet, it seemed that the lowest prices for the templates was on SewVacDirect. I have been itching to try tumbling blocks, so I bought a 6 1/2" tumbling block template. I'm just going to make something simple like this free pattern from the GO! website.


I had a bunch of black, white and red fat quarters that I bought during last year's CT shop hop. I bought them to go with a piece of minky my daughter picked out for the back of her quilt. You read that right...choosing the back fabric, and making the front match THAT. Here's what she chose:


The cutter works exactly like the company says it does. It actually seems to cut better with more layers of fabric. I could easily get six tumbling blocks out of each fat quarter. I didn't even have to cut it, just fold it.


I was able to cut around 75 pieces in, maybe 35-40 minutes. WAYYYYY faster than I could have cut on my own, and for SURE much more exactly than I am able to cut.

What was left, because the tumbling block is not square, were these great scraps. Lots of pieces, plenty wide enough and long enough. They are going right into my next experiment, wonky blocks!


As great as this machine is, and as happy as I was to get the pieces cut out that quickly, I know I won't be using this for every project. First of all, the templates can get pricey. And, to be truthful, I almost felt like I was cheating. I didn't get quite the same level of satisfaction as cutting the pieces myself. Net, net, I LOVE the machine, and I'm very happy I bought it, but I won't be using it for every quilt I make. If I'm making a special shape, or I need to make a top quickly, the Accuquilt GO! is for sure the way to go.

Sunday, January 9, 2011

BOM new and old with some argyle on the side

We are heading full on into the winter drudgies. At least that's what I call the time between New Year's Day and Easter. The long, cold, often dull time we New Englanders spend waiting for Daylight Savings time to come back. One of the things I love to do is force bulbs to bring a littler color into the house...


We got these gorgeous paperwhites for a Christmas gift from White Flower Farm, and amazing plant/gardening company here in CT that has an amazing catalog and mail order business. Everything I've ever gotten from them has been gorgeous.

I, like so many of you, put together a 2011 plan this week. It has goals for my sewing, design, and blogging. It has dates. It is written down, and I will be doing my darnedest to follow it. One of the more vague concepts is to keep learning, and to allow myself to make mistakes sewing.

With that in mind, I set out to do my seventh block in my Starry Night BOM quilt. I never posted doing block #6, so here's that one.


As you can see, my borders don't line up with the inside of the block. This has been an issue for me for all of the blocks. I am still not a proficient 1/4" sewer. I'm getting A LOT better, and I see improvement with every block, but I'm not there with the precision yet. Knowing this, I started number 7.


When I got to the edges, as usual, they were off. But...in honor of my new goals, I actually ripped the pieces apart *gasp*...the dreaded...UNSEWING. I actually walked away from the block for about 15 minutes, but I couldn't not finish, and I couldn't leave it as it was. So I started over. This was not an easy thing, but I was VERY happy with the second try.

Can you see the difference between the last one and this one? (PLEASE say you can).


I buckled down and did this, in great part because I got my first block for the Rose of Sharon BOM quilt. I've mentioned on Twitter, I am WAYYYYY over my head on this one. But I am for sure, if nothing else, a "sink or swim", baptism by fire kinda' girl. But...*gulp*...look at this...


This is block ONE?? Dear Lord. But I am diving in this week. I am bravely going to cut into that juicy fabric. (After I've confirmed, measured, and placed at LEAST twice). I will take any and all suggestions, tips, and know-how regarding applique. The whole purpose of this BOM is to get me over my debilitating fear of applique. I want to be fearless when it comes to my sewing machine...so what the heck, let's go full on.

Of course, I won't be feeling this brave all the time. So I'm working on a quilt for my son, that we bought fabric for close to two years ago. It's from a pattern in this FALL 2009 Quilt's 'N More magazine.


I am a huge sucker for argyle. I showed my son the pattern, and he picked out greens and creams for the fabric. And he picked gold minky for the back. You read that right. Gold. Minky. He's obviously into the "luxe" look.


I've got four of the 9 rows done, and all of the side pieces. I'll be excited to post pictures when the top is done.

What hairbrained project have YOU started this month?

Tuesday, January 4, 2011

Edith Twirl Skirt - Pattern Review and Pictures

I know, I know...it's been weeks since my last blog post. I have been working on a number of great projects, but the prospect of taking things out in the frigid cold to take decent pictures has not been very enticing...throw in the holidays, a snowstorm and well, you get the idea.

I wanted to get started again with a BANG, so I want to share my review of a pattern by the crazy talented Jona G. of Fabritopia. She has her own line of sewing patterns out, and I was fortunate enough to have her as one of my roommates at Quiltmarket in Houston in October.

The pattern I made up was her Edith Twirl Skirt. It comes with sizing for 2-10 and two different styles. I made a size 5 in View A, the one with only single fabric for the main skirt body (shown on the left in the pattern cover).


There are a few things that I LOVED about this pattern. First and foremost, there are no pattern pieces!! The pieces are all rectangles or strips cut the width of the fabric. What that means is that I can use this pattern over and over again, in different sizes WITHOUT TRACING. Can you say Hallelujah?? It also meant that it was quick to prepare, and I got right to the sewing.

The second thing that I loved, is that the paper it's printed on is very sturdy, and it's a single fold out page, two sided. WHAT did that just say??? No crazy pages to fold and try to re-order? That's right! Just follow, and flip. Again, simplicity is often genius.

The pictures that Jona included are also very clear. I did have to pull out and re-pin one part. Thankfully I had not sewn yet, and I realized by looking at the shading on the pieces that I had them placed incorrect sides together. The directions were clearly written, and the graphics were very helpful.


I bought a number of pieces of Anna Maria Horner's Innocent Crush after I saw it at Quiltmarket in October. It is just GORGEOUS and the fabric quality is outstanding. My daughter Ally chose three of the patterns and told me exactly where to use each of them. The result was just adorable. No pictures actually on Ally yet, but they will come.


I will say, that is a whole lotta' skirt for a tiny girl. My daughter is only about 37 pounds at 6 years old, so she's a Skinny Minny. But she loves the volume.

Other things I would note about the Edith pattern...

There is some serious gathering to be done with this pattern. If you are not comfortable with gathering techniques, this might not be the first one I would try. I thought I actually enjoyed making ruffles and gathering. That was until it took me three tries to get the gathers for the skirt lining to match up with the outside skirt panel. The results, though, once I got it, look adorable. My only comment would be this is not necessarily a beginners pattern.

And then, there was the snow...


On another note...we got that big blizzard the day after Christmas that the rest of the Northeast (and some of the SOUTHeast) got. We ended up with maybe 12-14" at our house. Ally LOVED it. The dog, not so much.


Here's my fun girl doing one of her favorite things to do in the snow...make snow angels. And boy, is she good at it!


What did you do over Christmas vacation??

Friday, December 3, 2010

My First Tutorial! Child's Artist Beret

Wow, I don't know about you, but this is pretty exciting for me. This is my first tutorial on this blog. I'm going to show it as a post here, but I've also made it into a PDF. It may take some wrangling for me to figure out how to add that...but it's done and just a matter of getting it to work.

I blogged about making 25 of these last winter for my daughter's kindergarten class. They were doing a unit on "Fine Art", so to get themselves in the mood to work like artists, they each wore a beret, like Vincent Van Gogh, or, if you prefer, Fancy Nancy. When the teacher asked me to make them, she gave me a photocopied sheet of someone's hand written directions. Immediately I thought I should do a tutorial, and here we are, a good 7 months later. All in good time.


Please, please, share any comments or suggestions you have if you make any of these. Without further ado...


Child’s Beret – A la Fancy Nancy or Van Gogh, or whomever your favorite artist might be

Materials:
18” square piece of craft felt
2 yards of double fold bias tape
2 ½ yards of ¼” elastic
Coordinating thread

Steps:

1. Cut an 18” diameter circle from your felt

2. Pin the bias tape, open side towards the cut felt edge ¼” from the edge. Do not overlap the ends of the bias tape, but put the two cut edges as close together as you can. (See Image A) The closer you’re able to get them, while not overlapping, the better the beret will sit evenly and the more “round” looking it will appear.


3. Stitch along the open edge of the bias tape, as close as you can to the edge, ensuring that you stitch through both layers. I suggest pinning a lot. This seems to help keep the layers from slipping apart, which the bias tape seems to do when you’re not looking!

4. Make sure you leave enough room in the “pocket” of the bias tape to slide the elastic through.

5. Put a safety pin through the end of the elastic to make it easier to pull through your “pocket” of bias tape. Start at one end of the opening, and slide the elastic through, all the way around your beret. Try to keep it as flat as possible as you do this, it will help to make the beret sit flatter on your child’s head.

6. Pull the ends of the elastic together to tighten the circle up and create your beret. Use your child’s head as a guide for how large or small you need the hat to be. Knot both ends of the elastic, but DO NOT CUT IT.

7. You can knot the two pieces together and tuck them up inside the beret to keep the size steady. The reason for not cutting is that you can adjust the size as your child grows.

8. Make a tiny slit (and I mean tiny!) at the very center of the beret. You can use yarn, ribbon, or rickrack folded in half to make a loop. Once your loop is folded in half, push the folded end through the slit in the center of the beret. You can either knot them together, or make 3-4 stitches to hold it in place. (Image B)


9. Voila! You have a fancy beret to inspire your little artist to make wonderful creations. (Image C)


So run, run to make your kids some berets so they can make you some FINE refrigerator art.

Monday, November 29, 2010

UFO! Baby Clothes Blanket for Jane

Because a pretty big portion of my sewing gets done in the dark (aka before sunrise) I figured what better way to photograph this baby clothes blanket than with the morning sun coming up. I made a promise to myself that I wanted better blog pictures, so I braved the cold this morning and went out on the back porch to find some natural light.


This is a small lap quilt I made out of baby clothes sent to me by my sweetie's cousin. They are from her youngest daughter (she has three, which means there are two more projects quickly to follow behind!). The back is a crib sheet. The bag of sweet baby things has been in my sewing room since JULY! Now, in the land of my sewing room, that might not even qualify for a UFO, just something that I've put down for a few days.


Jessica asked me to make something simple (thank GOD) with squares and triangles. So every time the mood struck me, I'd carefully go through the pile and cut a few more squares. When the pile looked pretty big...I started sewing. Not very scientific, or very organized, but I have to tell you, I love the way this came out.


Of course you can see that my quilting leaves SO much to be desired still...but I did learn a whole bunch of things while I was working on this project.

1. Different fabrics, even when cut into relatively small pieces, can still give you loads of trouble trying to sew straight, with even stitches.

2. Using an insane number of pins for binding makes all the difference in how straight the stitching comes out. (Speaking of which, I see some people use those hair clips to hold their binding...do you?? why?? is there something I should know about binding using hair clips?)

3. Cats love baby clothes to lay on even more than freshly laundered fabric.

4. For some reason, the sweetness of upcycling a baby's things, even when it's not your own baby, makes the project really enjoyable. I can just imagine the adorable skirts and dresses on my cousin-in-law's daughter, and I hope she loves seeing her things made into a blanket she can keep forever.

5. I have given myself permission to love satin blanket binding. It reminds me of being little myself. I always had blankets with that kind of binding on my bed, and they seemed so glamorous to me then! I had to press into half size, or it would have taken up too much of the outer squares, but it really looks cute with the clothes. It would have taken me 10 years to make a binding out of the tiny clothes I had left.


Of course, I did all of this cutting before I bought my AccuQuilt Go! cutter the other day. I got it at Joann for $199. I've been searching and hunting for it, to find the lowest price possible, and I snagged it as soon as I saw the flyer come out. I'll be cutting my next quilt with it, so I'll tell you all about how much I love it.

Sunday, November 21, 2010

Starry Night BOM #5

It's so hard to believe, but FIVE months have gone by. I don't think that's one of the goals of BOM clubs, but boy do they help you see how quickly time passes.

This is my fifth block.


I actually ripped out one of the rows and re-sewed it because it was so far off. I do see progress in the tightness of my corners, but boy, do I still have a long way to go.

I also signed up for a Sharon Pederson, Roses of Rememberance applique BOM that starts in January. I'm really excited about that because I have almost no experience with applique.

My next pictures will be of the baby clothes blanket I'm making for a family member. It's all cut and laid out, all that's left is the fun part...SEWING!